Showing posts with label baking. Show all posts

Thursday, October 6, 2011

Food Torture

...aka, making pumpkin whoopie pies on the first day of a thirty-day nutrition cleanup.

So, Saturday - October 1 - marked the first day of the CFCC BCCC. Which is also the first day of my thirty days of no cheat meals (or, as Drywall would say, no kip meals). It was also the day that my friends and I had been planning for weeks to have dinner. I was put in charge of dessert, which, as a rule, makes me happy, since I love to bake. (Mostly for the batter, actually. I feel "meh" about actual baked goods, for the most part - with a few exceptions. But raw cookie dough or raw cake batter? Oh god, sign me up. And give me salmonella. Whatever.)

If I were a complete jerkface I'd have brought a bowl of mixed berries to my friend's house. But not so much. Instead, I did what I usually do when I can't decide what to bake - scour EatLiveRun's "recipes" page and find something fabulous.


PUMPKIN WHOOPIE PIES WHAT.


I know Jenna's a baking genius, but it's little things like this that make it clear. Along with the usual suspects in pumpkin baking (cinnamon, ginger, cloves and nutmeg), these whoopie pies had a little bit of white pepper. I assume it brings out the other flavors. Maybe I'll make these again in November and make sure.


So, we go from this


to this.


While they cooled, I got to work with this:


SO NOT PALEO. Or, well, I guess this part (where it's just a ton of softened butter all whipped up) is arguably paleo. In someone's world. If you wanted to lick whipped butter off of the beater. Which even I did not.


I particularly love making baked goods that include homemade frosting. I guess it's because something like a basic vanilla buttercream is so freaking easy, but it's one of those things that most people don't do, so they find it impressive. Like driving stick, or using chopsticks.


A little piece of me died inside when I couldn't taste this. Instead, I called PhillyGuy in from the living room, where he was parked watching football, to taste the buttercream for me. "Does it need more vanilla? What if I added some cinnamon and made half of them with cinnamon filling?" Poor guy's got it rough.


After the cakes (pies? cookies? whatever) were cooled, I piped in the frosting and assembled everything. Behold, the whoopie pie.


Once again, I had PhillyGuy sample the finished product to make sure it was OK. This was unnerving, because here I was, bringing eighteen homemade whoopie pies - something I'd never made before - to dinner with friends without having tasted them AT ALL to make sure they were okay. And trust me, I have screwed up some baked goods before. Like that time I tried to make candy cane Joe-Joe's. THAT was not pretty.

But he gave his seal of approval. And my friends all gave their seals of approval. I think between the seven-and-a-half (including my friend's 11-month-old daughter, who heartily approved of the whoopie pie) others who were at dinner, at least half of the whoopie pies went that night, and I distributed the rest of them to my friends to take home.

Perhaps a piece of me died a little inside, but I'm pretty proud to report that this food torture went down without my tasting so much as a single scrap of cake, drip of batter or speck of flour. One of my friends commented on my "amazing willpower." I definitely do NOT have amazing willpower. What I do have is the ability to flip a switch inside my brain once I decide I am on a structured plan of some kind.

And also it helps when you start your day with a good solid sweat, and then eat this before you bake.


(Three eggs over-easy, served over a handful of baby spinach, half a diced sweet potato cooked in a skillet with some chopped onion, and two beautiful slices of fresh cut black forest bacon from Whole Foods.)

VIVA LA CFCC BCCC. And...MAKE THESE WHOOPIE PIES. Thank you, Jenna.

Thursday, December 23, 2010

Snowphie

Don't worry, this is from last year.


There's no snow on the ground here in Philly at the moment.

Also, we got her a new coat shortly after this surprise blizzard. She was about 7 or 8 months old in this picture, and baby puppies grow FAST. Her coat is no longer cropped.

Things I've been up to this week:

- copious amounts of work
- forcing myself back into a regular workout schedule (averaging 3-4x per week - yes, I should be going more like 5-6 times, but baby steps...this is better than my 2-3x that I'd slipped into)
- running shorter and faster - I LOVE INTERVALS! they're good for avoiding the hamster wheel syndrome
- hosting a dinner party
- making holiday treats
- hunting down Candy-Cane Joe-Joe's (sold out everywhere - EXCEPT for the store by Allison's parents' house! HOORAY FOR FRIENDS!)
- attempting to make my own Candy Cane Joe-Joe's...which was an epic fail.

I'll share my adventures with everyone shortly. SWEAR!

Saturday, October 2, 2010

Friday Night Adventures

Adventures in baking, that is.

But first. Sometimes, there's only one thing you need at the end of a long week.


Okay...maybe two things.


After enjoying some Murphy-Goode pinot noir and a couple pieces of Lazaros - my favorite delivery pizza in the city! They do some crazy magic that makes the crust juuuuust right, the sauce is sweet but not too sweet...I love it! - I got down to business.

REAL business. The key ingredient in Friday night's baking adventures was...


BACON.

Yeah, I went there. I made bacon chocolate cupcakes with homemade caramel buttercream icing. I used Scrumptious Photography's recipe - no adaptations at all. Except that I made a half batch, which should have yielded 12 cupcakes rather than 24...but it actually ended up yielding 16.

I started with the cupcakes. Melt together your chocolate and butter. I used the metal bowl of my mixer as a double boiler:


Stir in your sugar:


While the chocolate cools, whisk together your dry ingredients and chop your super-crispy bacon.


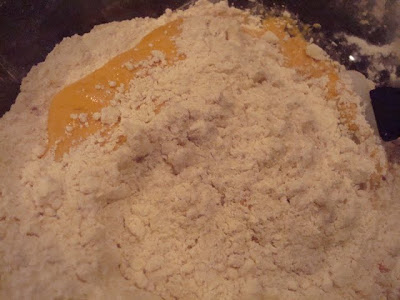
After adding your eggs, one at a time, to the chocolate, it's time to stir in the dry.


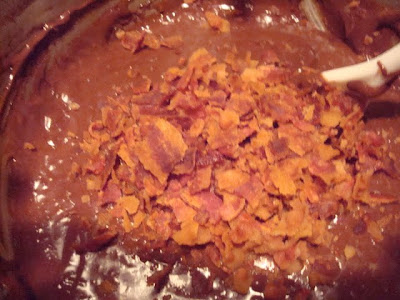
And then your secret ingredient - fold in most of the chopped bacon. I say "most" because I decided to reserve a bit to use as topping/decoration for the cupcakes...couldn't tell you how much.


Once it's all just incorporated, fill cupcake liners about 2/3 of the way full. Bake at 350 degrees for 20-25 minutes.


While the cupcakes are baking, start the icing. By, you know, MAKING YOUR OWN CARAMEL.


I MADE MY OWN CARAMEL, BITCHES! Honestly, I think you'd do just fine using store-bought caramel topping, but making your own is surprisingly easy. And then you get to say "I MADE MY OWN CARAMEL BITCHES!"

This is what FOUR STICKS of butter looks like beaten in with eggwhites and sugar.


And then it's time to switch to your paddle attachment to blend in your HOMEMADE CARAMEL!


MAN, this frosting is delicious. I mean, wow.

Now, my decorating skillz are...shall we say...amateur. But for having never made cupcakes before? Ever? Let alone making them from scratch and making the icing from scratch and using an icing tip for the first time in my life?


I can deal.


Thank goodness Stephanie and I had a running date this morning. I only ate a couple bites of cupcake, but way more than my fair share of frosting and batter while I baked :) We braved the Kelly Drive/West River Drive/Art Museum loop, despite yesterday's insane flooding, and covered 8 miles in about 1:25.


Busy day - time to go get my haircut, hang with some great bloggy friends for a fun event at Sabrina's, and then out to the 'burbs for a "Diaper BBQ." Some of my bacon cupcakes might make the trip out with me...

Monday, September 27, 2010

Weekend Project Part 2, and SCONES

So, first things first. You saw the sad state of my BEFORE. About twelve (total) hours of painting and a little more cleanup later, here's the after:


I have to admit, I was more than a little "over it" about halfway through, but I am SO GLAD I bucked up and did this. I love the way the room looks now.

Tonight, I embarked on another little project. I've been seriously bitten by the baking bug lately, and over the weekend all I could think about was pumpkin scones. For a couple of reasons, really - one, I love, LOVE all things pumpkin (see pumpkin centerpiece on kitchen table and vanilla pumpkin scented candle on bar, above), and two, I'm obsessed with the scones at Cafe Lutecia. I figured if I could learn to do scones the right way, I'd have REALLY accomplished something.

Well, you know, that and seeing this seasonal obsession on blogs everywhere.


I was so intimidated by the almighty scone that I really researched this bad boy. I cobbled together tips from all over the 'net, but generally followed this recipe, which claims to be a double for Starbucks pumpkin spice scone. I've never had one from Starbucks, so I can't speak to the truth of that, but MAN, these are good.


Cinnamon, ginger, clove and nutmeg.


Whisked together with the other dry ingredients (except for salt. I omitted the salt - not intentionally, I just forgot about it, and the scones don't seem to have suffered for it) and then cut in six tablespoons of COLD butter until just dry and crumbly.


In a separate bowl, I combined the pumpkin, an egg, and a couple tablespoons of half & half. True story - while doing this, I put the butter/dry mix in the freezer. I do not know whether this made any sort of difference, but I was paranoid about getting my little butter nubbins into the oven without melting first.


Take the dry out of the freezer. Fold the wet into the dry.


Knead juuuuuuuust a bit on a floured surface. Spread into a rectangle, cut into triangles. Leave the triangles together while you bake.


Mine needed about 17 minutes total at 425. Would have probably been closer to 14 or 15 minutes, but I accidentally closed the oven mitt in the door, so it was open a crack and let some heat escape.

While they were baking I mixed up the plain glaze. Recipe called for milk - I only had half & half, and I felt I needed to add about twice the amount called for to get the right consistency.


I also ended up using about half the glaze I made, which was plenty. I brushed it on with a pastry brush in two layers. One to melt beautifully all over, and one to thicken the coating a bit.


I used the leftover plain glaze as a base for the pumpkin spice icing drizzle. I just about doubled the spices called for in the recipe and mixed them into the plain glaze, together with a few more shakes of confectioner's sugar until I had the consistency I wanted.


The result?


OOOOOH. I like these.


Even with twice the spices, I didn't really taste a strong pumpkin pie flavor in the icing. I would probably add even more next time, or skip the plain glaze altogether.

I'm kind of in disbelief that I actually made scones. They aren't tough, they aren't dry, they aren't bland and floury. Holy crap. But really? Someone GINA said the other day -like, REALLY RECENTLY AND IT IS DRIVING ME CRAZY BECAUSE I CANNOT REMEMBER WHO (thank you e!) - "if you can read, you can cook." And, well, would you look at that.

Recipe:

Pumpkin Spice Scones, adapted from Food.com

Scones:
- 2 cups all-purpose flour
- 7 tablespoons sugar
- 1 tablespoon baking powder
- 1 teaspoon cinnamon
- 1 teaspoon nutmeg
- 1/2 teaspoon ground clove
- 1/2 teaspoon ground ginger
- 6 tablespoons COLD butter, cut into chunks
- 1/2 cup canned pumpkin
- 3 tablespoons half & half
- 1 egg

Whisk together dry ingredients.
Using a pastry cutter, two knives or food processor, cut in butter until dry and crumbly.
(If paranoid, put butter crumbles into freezer, bowl and all.)
Mix together pumpkin, egg, and half & half with a fork until blended.
(Remove paranoia bowl from freezer.)
Fold wet ingredients into dry until the dough just comes together. The mixture should stick together, but the wet/dry separation still evident.
Flip dough ball onto lightly-floured surface and knead lightly until dough resembles, well, dough.
Form dough into rectangle about one inch thick. Cut into three equal pieces, and cut each piece in half diagonally to form six triangles.
Leaving triangles touching one another, bake at 425 for 14-16 minutes. Cool on wire rack.

While cooling, make glaze.

Plain Glaze:
1/2 cup plus 1 teaspoon confectioner's sugar
2 tablespoons half & half

Add half & half gradually, and whisk together with fork until the texture is as you like it. Less half & half will give you a more spreadable icing; more will give you a brushable glaze. Use whichever method you prefer to coat the tops of your still-warm scones with plain glaze. While it sets, make pumpkin spice glaze.

Pumpkin Spice Glaze:
1/2 cup plus 1 tablespoon confectioner's sugar
1/4 teaspoon cinnamon
1/4 teaspoon nutmeg
1/8 teaspoon ginger
1/8 teaspoon clove
1 tablespoon plus 1 teaspoon half & half

Add half & half slowly and mix, as above. This glaze should be thicker, but still thin enough to drizzle. TASTE the icing as you make it - add a few extra shakes of each spice if you want a stronger flavor. Drizzle over scones.

Salivate. Enjoy.

Thursday, September 23, 2010

BLONDIES!

I love fall.

(really, I love the "big" change of seasons - from the two cold seasons to the two warm seasons and vice versa - because I get to change up my home decor. Last weekend I replaced the pretty vase of white flowers on my kitchen table with my big wax pumpkins.)


I've been in a "baking" kind of mood lately. Last weekend, I treated my football-watching dinner guests to Jenna's AMAZING chocolate chip cookies. This weekend, I was grocery shopping and randomly decided to attempt another Eat Live Run recipe: BLONDIES.

These are particularly great for compulsive last-minute impulsive bakers like me, because they are very quick to make and take almost no preparation.

Unlike the amazing cookies, which require you to pull the butter out of the fridge hours ahead of time, so that it can softed, these call for melted butter. Which means that someone like me, who almost NEVER uses butter, can just pull the butter right from the freezer into the saucepan. I melted mine on low to medium heat and poured it right over the brown sugar.


Combined well and added my egg, vanilla, and salt:


And then stirred in the flour.


It had kind of a yin-and-yang effect with the dark brown sugar/butter/deliciousness mixture.


It was SO, SO easy. So easy, in fact, that when I popped the first glass pan into the oven, I thought to myself "you know, one stick of butter and half a package of brown sugar can't possibly be enough dessert for MY family. I'd better make a second batch." And I did.

My only drawback is that I did not HAVE an 8x11 pan, like Jenna did. I used a 9x9 pan instead, which required me to adjust the cooking time. A lot. Like, "oh, five more minutes" about four thousand times. After spending what felt like the entire afternoon in the oven, I finally got this.


and this.


They were a hit with my family. They were almost TOOOOOO rich for me - I needed a glass of milk or some nice cold vanilla ice cream to go with it, but alas, I had neither. Didn't stop me from eating two, though.


(And it probably wouldn't stop me from eating the entire bowl of raw dough next time. Confession? As much as I love to bake, I can really take or leave completed baked goods. I'm more of a savory person than I am a sweet person...but give me raw cookie dough any day. Salmonella? What's that?)